Lesson 0 - Using your IDE
This lesson will go over the basic functionality of the IDEs highlighted in the Preparation page.
Table of Contents
Lesson Objectives
- Learn how to create, edit, and run Python files.
Choose your IDE
Follow the instructions outlined in one of the dropdown menus below.
Jupyter Notebook - Recommended
If you haven’t already, sign in to Jupyter Notebook.
The home page of Jupyter Notebook is the file explorer, where you can access any files you created. If it’s your first time using Jupyter Notebook, it’ll be empty. To create a new Python Notebook file (.ipynb), click on the New button at the top right and select Python3 (ipykernel).

You should automatically be sent to your Python Notebook environment. It should look like the screenshot below.
- If you ever want to go back to the home page, click on the JupyterHub logo at the top left.
- You can rename your Python Notebook file by clicking on the “Untitled” text beside the JupyterHub logo.
- To save your file, use the
Save and Checkpointbutton with a disk icon found below the JupyterHub logo. You can also useCtrl+Sshortcut (orCmd+Sfor Mac users) to save.

Your Python Notebook file consists of code blocks. You can write Python code in these blocks and run them using the Run button. If there’s any output, it will be shown directly below that code block.
If a code block is taking too long to run, you might have encountered an infinite loop. Use the interrupt the kernel button beside the Run button to stop it.

To create new code blocks, click on the + button beside the Save and Checkpoint button.
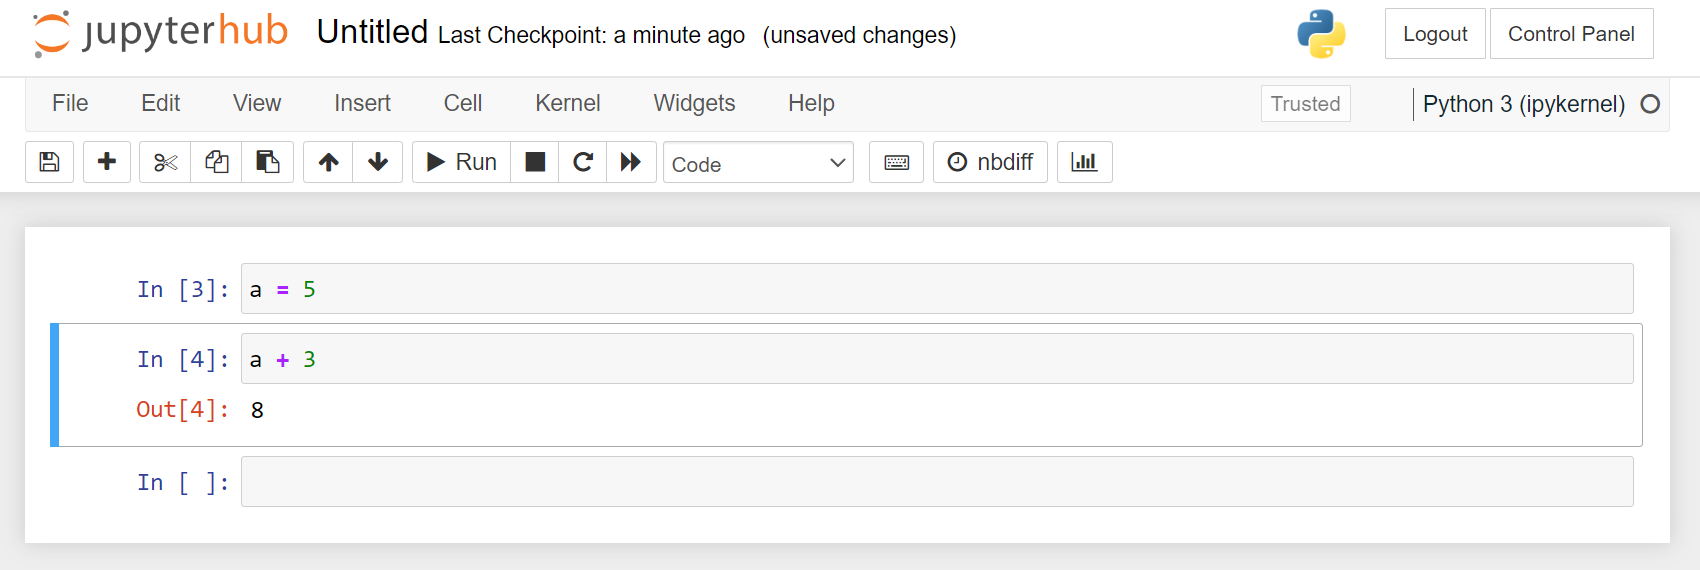
No matter what code block you’re on, Python Notebook will keep the data of all previously run code blocks. If you’re opening up a Notebook, or your Notebook connection resets, you have to run every block code from the start.
Google Colab - Online Alternative
If you haven’t already, sign in to Google Colab.
After signing in, you may encounter the Recent page below. This is where you’ll be able to open up recent Python Notebook files (.ipynb). To create a new Python Notebook file, we’ll need to Cancel out of this pop-up.
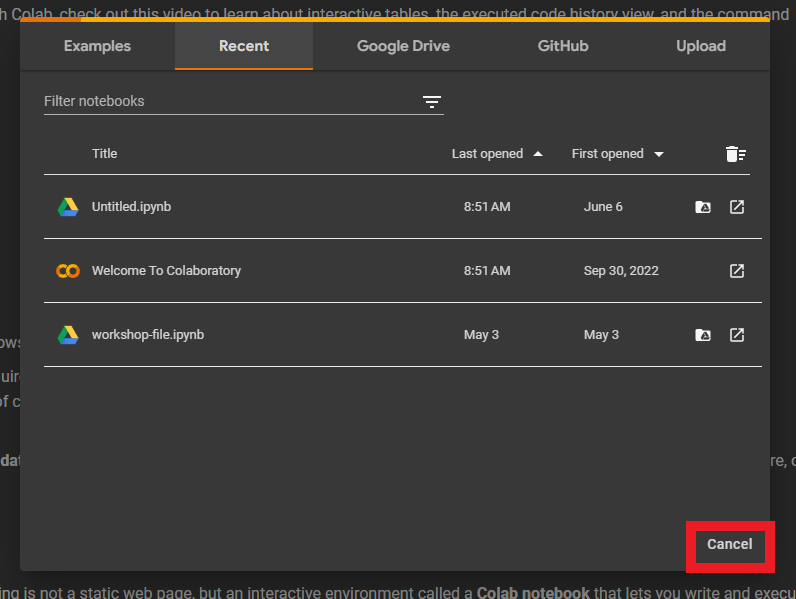
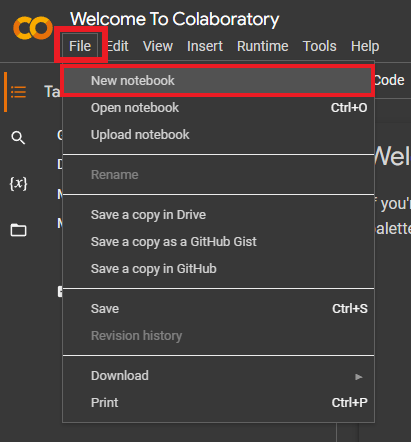
Navigate to the top left of your screen, click on File, and then click on New notebook.
You should automatically be sent to your Python Notebook environment. It should look like the screenshot below.
- To view all of your Colab files, click on the Colab logo at the top left.
- You can rename your Python Notebook file by clicking on the “Untitled.ipynb” text beside the Colab logo.
- Google Colab automatically saves your work, no need for manual saving.

Your Python Notebook file consists of code blocks. You can write Python code in these blocks and run them using the Run button. If there’s any output, it will be shown directly below that code block.
If a code block is taking too long to run, you might have encountered an infinite loop. Use the interrupt the kernel button beside the Run button to stop it.

To create new code blocks, click on the + button beside the Save and Checkpoint button.
No matter what code block you’re on, Python Notebook will keep the data of all previously run code blocks. If you’re opening up a Notebook, or your Notebook connection resets, you have to run every block code from the start.

Anaconda - Local Version of Jupyter Notebooks
If you haven’t already downloaded and installed Anaconda:
- Download and install at https://www.anaconda.com/.
- Follow along with the guide for your OS system for installation instructions.
Once that’s installed, open up the Anaconda Navigator application. Included in the Anaconda package are four great tools/IDEs to create Python files with. JupyterLab, Jupyter Notebooks, Spyder, and Visual Studio Code.
Spyder and Visual Studio Code are standalone IDEs, whereas JupyterLab and Jupyter Notebooks opens up locally in your browser. For the purposes of this workshop, we recommend you use Jupyter Notebooks.
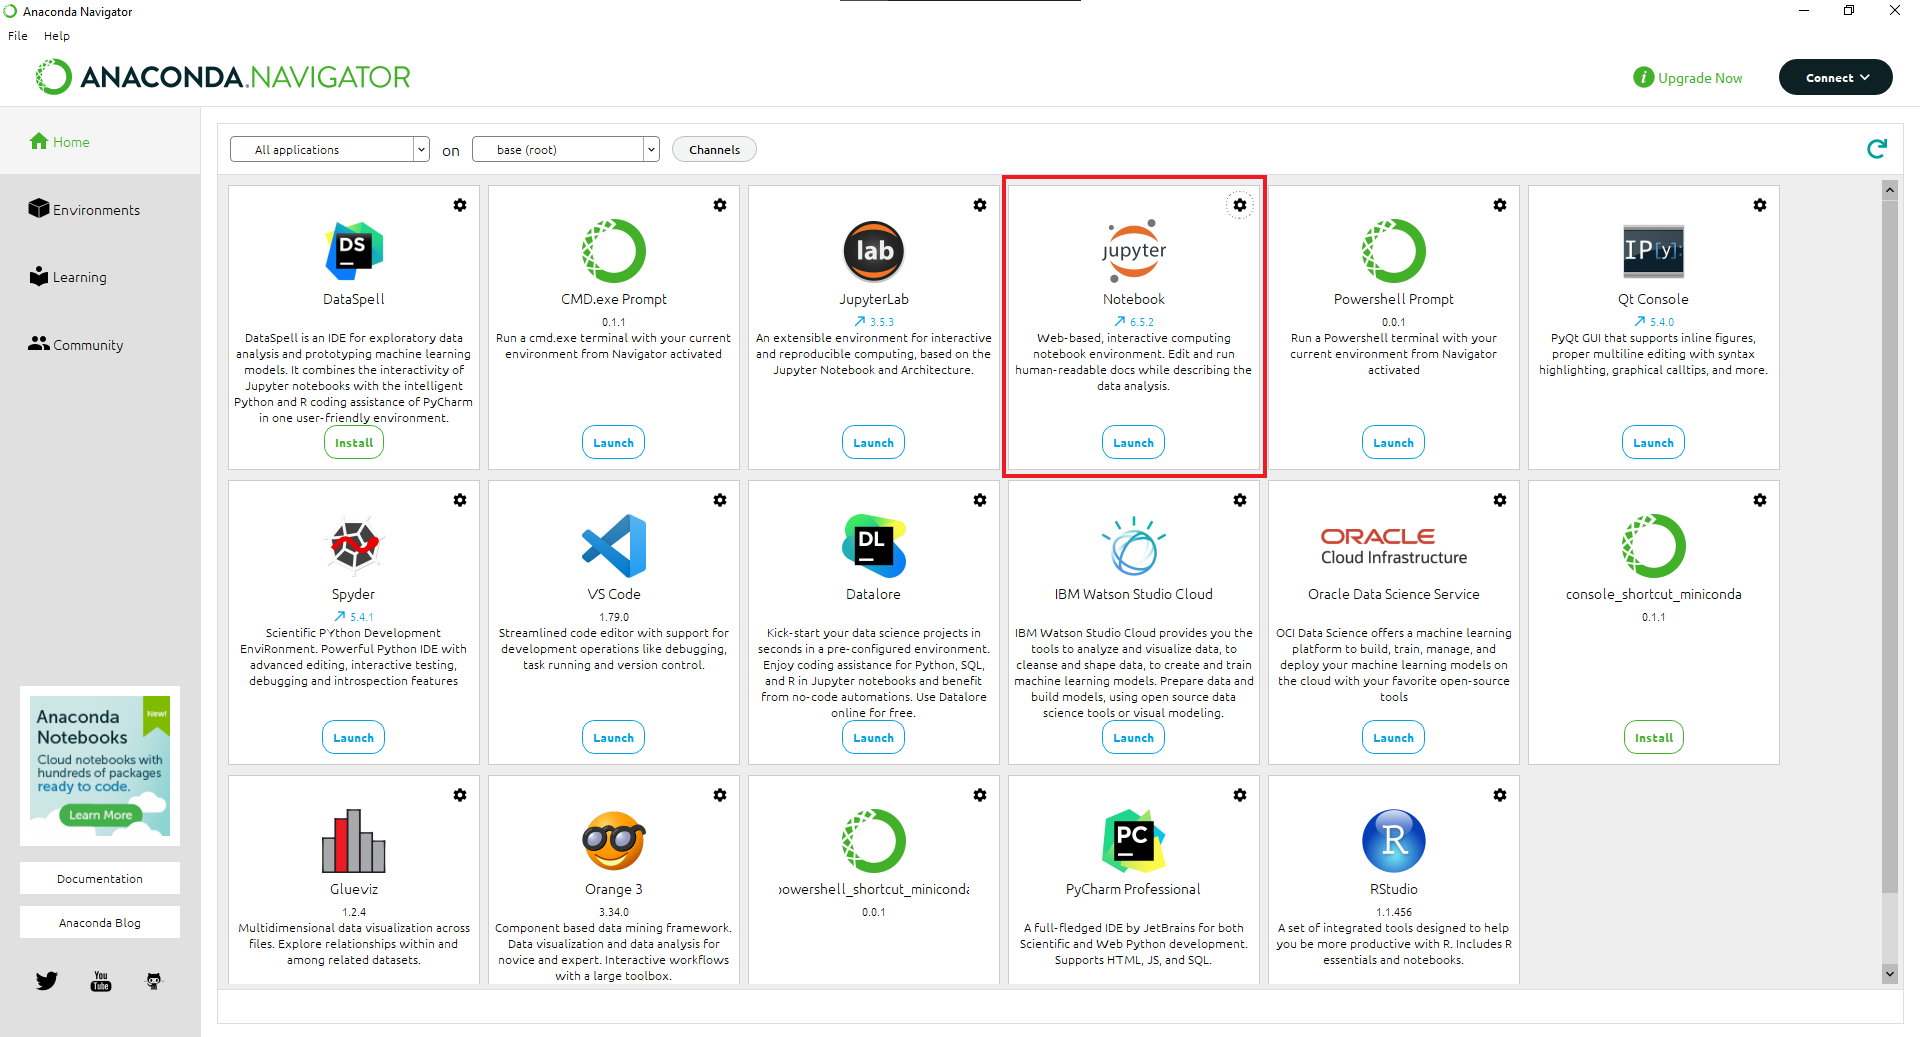
When you first launch Jupyter Notebooks, you will see a file explorer. Go to the location you want to store your Python files in, (I recommend making a new “Python” folder in the Documents directory).
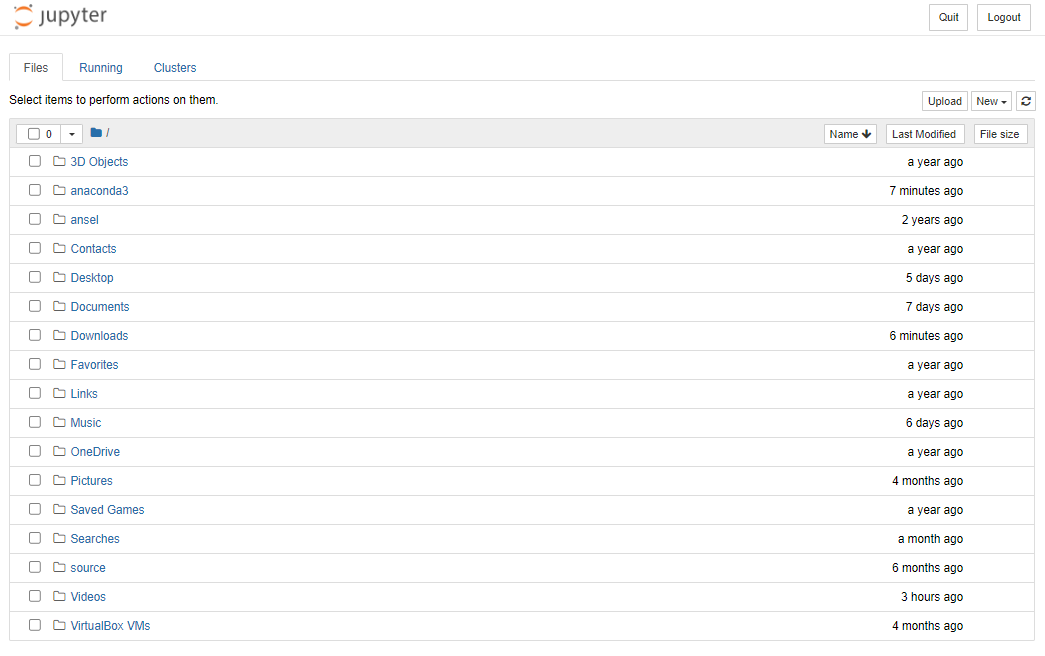
To create a new Python Notebook file (.ipynb), click on the New button at the top right and select Python3 (ipykernel).

You should automatically be sent to your Python Notebook environment. It should look like the screenshot below.
- If you ever want to go back to the home page, click on the JupyterHub logo at the top left.
- You can rename your Python Notebook file by clicking on the “Untitled” text beside the JupyterHub logo.
- To save your file, use the
Save and Checkpointbutton with a disk icon found below the JupyterHub logo. You can also useCtrl+Sshortcut (orCmd+Sfor Mac users) to save.

Your Python Notebook file consists of code blocks. You can write Python code in these blocks and run them using the Run button. If there’s any output, it will be shown directly below that code block.
If a code block is taking too long to run, you might have encountered an infinite loop. Use the interrupt the kernel button beside the Run button to stop it.

To create new code blocks, click on the + button beside the Save and Checkpoint button.

No matter what code block you’re on, Python Notebook will keep the data of all previously run code blocks. If you’re opening up a Notebook, or your Notebook connection resets, you have to run every block code from the start.
Key Points / Summary
- There are many ways to create, edit, and run Python files.