Lesson 2 - Connecting Git to GitHub
While you can just use Git locally, connecting your repository to GitHub will allow you to work on multiple machines and share your project with others.
Table of Contents
Lesson Objectives
- Link your Git repository to GitHub
- “Push” and “Pull” commits between your local repository and remote repository
Creating a Repository on GitHub
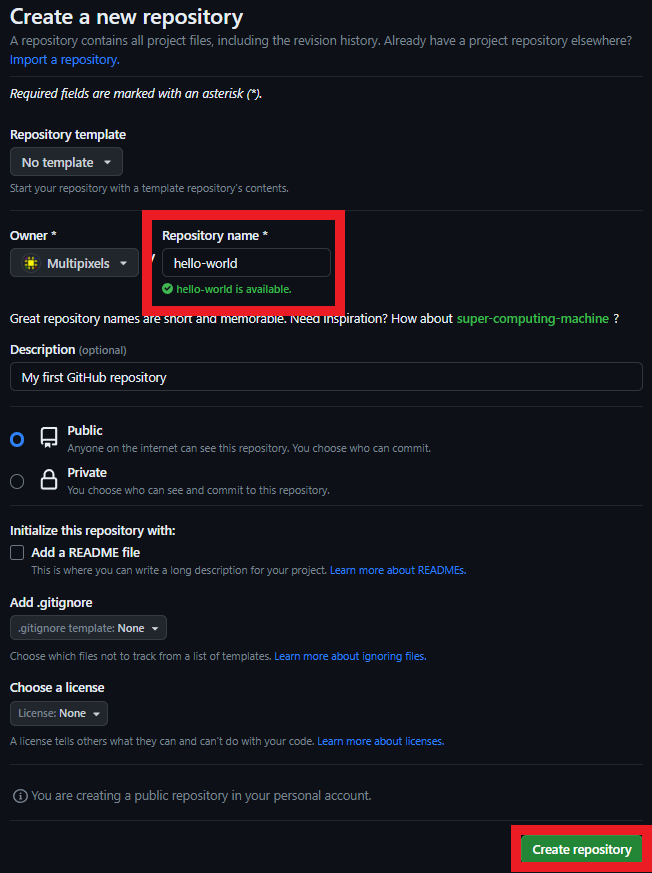
We need to create a blank repository in GitHub to connect our local Git repository to GitHub.
- If you haven’t already, open up GitHub and log in.
- From the GitHub main page, click on the
Newbutton at the top left of the page.

- Provide a name for your repository.
- There are some characters that are not allowed in your repository name, such as spaces and certain symbols.
- Optionally, you can also include a small description about your new repository.
- Do not select any settings from the “Initialize this repository with” section. We want to initialize our repository using our local Git repository.
- Click on the green
Create repositorybutton when you’re finished.
Pushing our Existing Repository
After creating the repository, you should now see some instructions to create a new repository or push an existing one.
- Copy the commands outlined under …or push an existing repository from the command line one line at a time into your Git terminal.
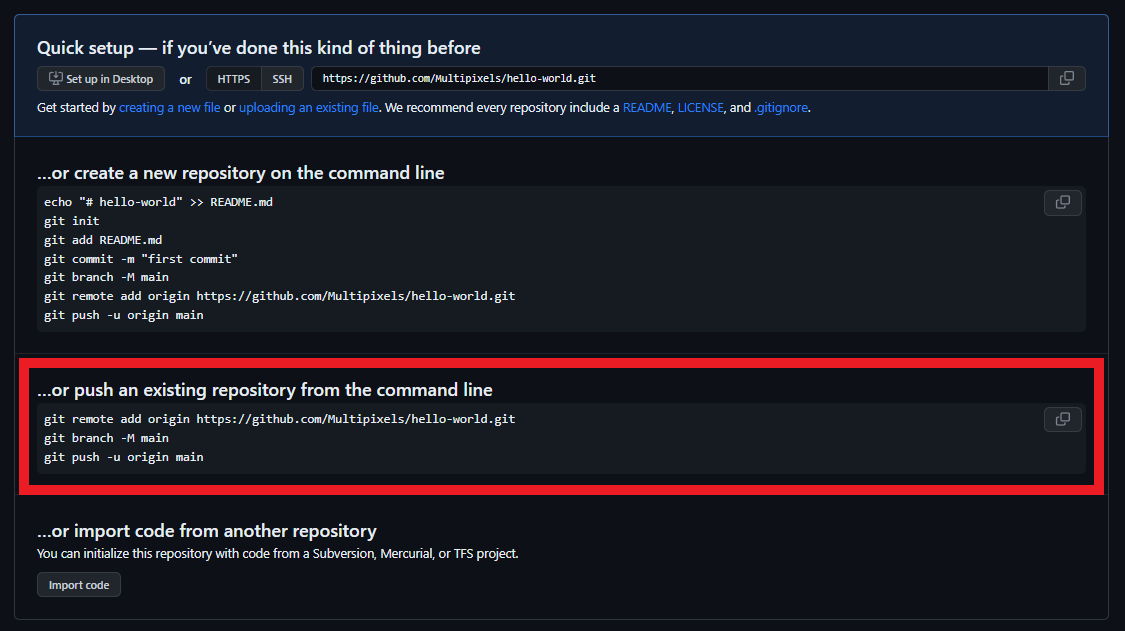
git remote add origin https://github.com/username/hello-world.git
- Make sure to copy the URL from your own GitHub repository’s instructions.
git branch -M main
- The line above renames our default branch to “main”, in the case that it was still “master”.
git push -u origin main
- Finally, this line pushes our local repository to GitHub.
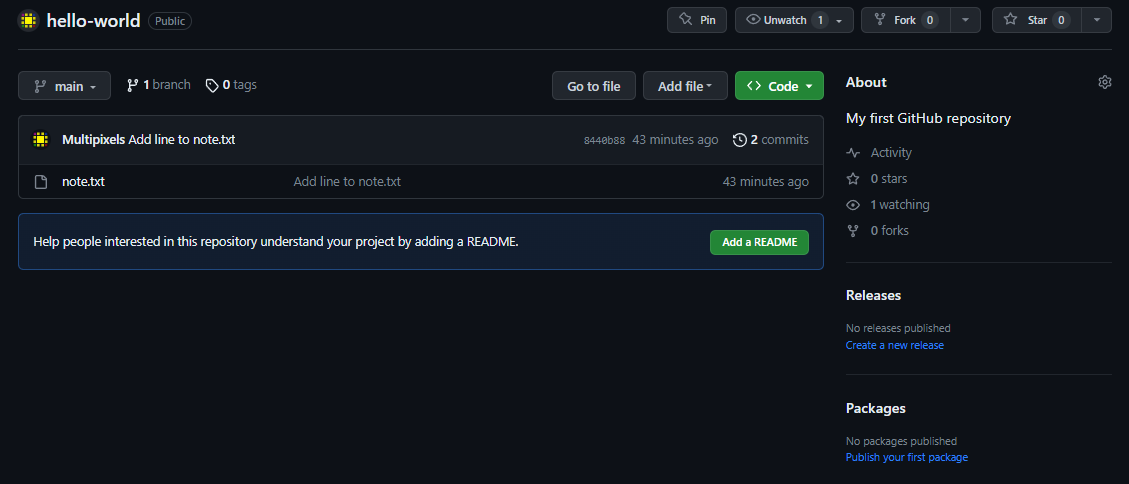
Once that is set up, you can refresh your GitHub page and you should see your “note.txt” there.
Pushing and Pulling Commits
The repository on your computer is known as your local repository, whereas the repository on GitHub is known as the remote repository. Changes made in your local repository won’t immediately show up in your remote repository, and vice versa.
In order for the repositories to sync with each other, you have to push or pull commits.
- Push
- Changes from your local repository will be pushed up to your remote repository.
- Pull
- Changes from your remote repository will be pulled down to your local repository.
Pushing to GitHub
Let’s make some changes to our note.txt.
- Add a line of text, remove a line, or perhaps rename the file.
- Commit your changes.
Reminder
First you have to add your changes, then commit.
If you take a look at the remote repository on GitHub, you’ll notice that note.txt has not changed since your last commit. That’s because we have not yet pushed our changes.
- To push our changes, use the
git pushcommand.
git push
Now, the changes made to note.txt should appear in GitHub.
Pulling to your Local Repository
While we’ve only been making changes to our repository locally, we can also make changes on the GitHub web interface as well.
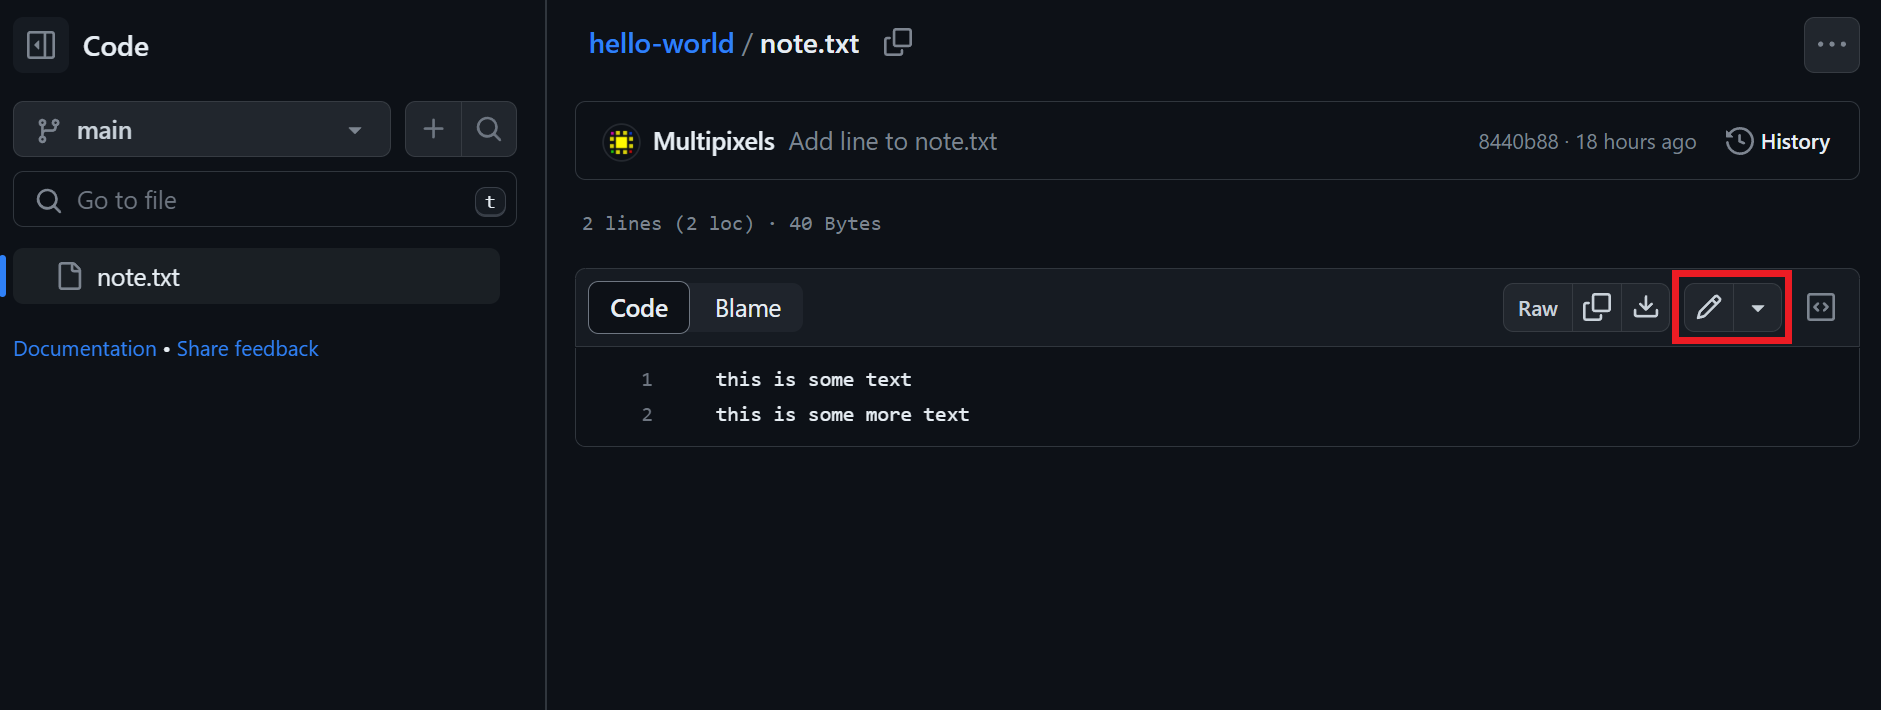
- Go back to your GitHub web interface and select the
note.txtfile.
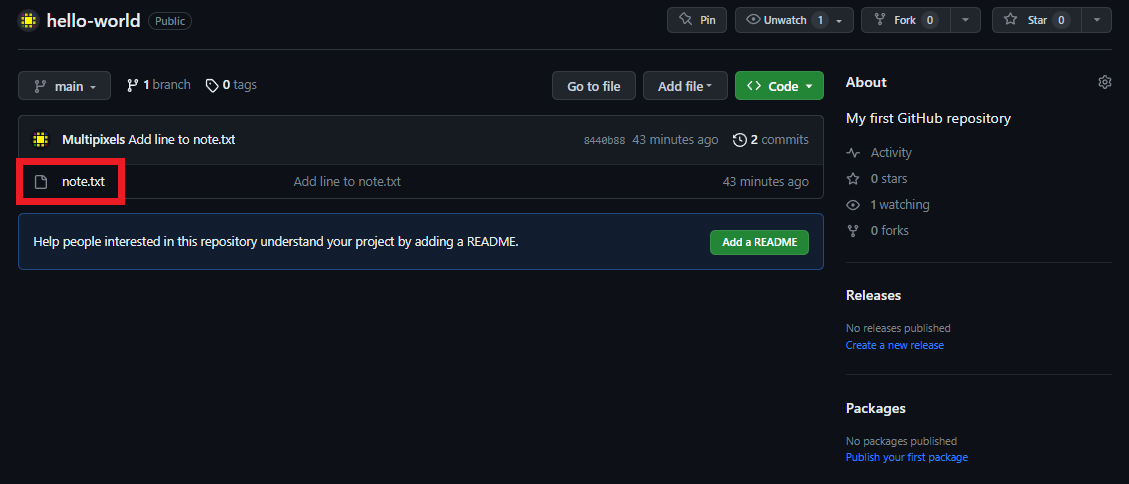
- Click on the pencil icon at the top right to edit the file.
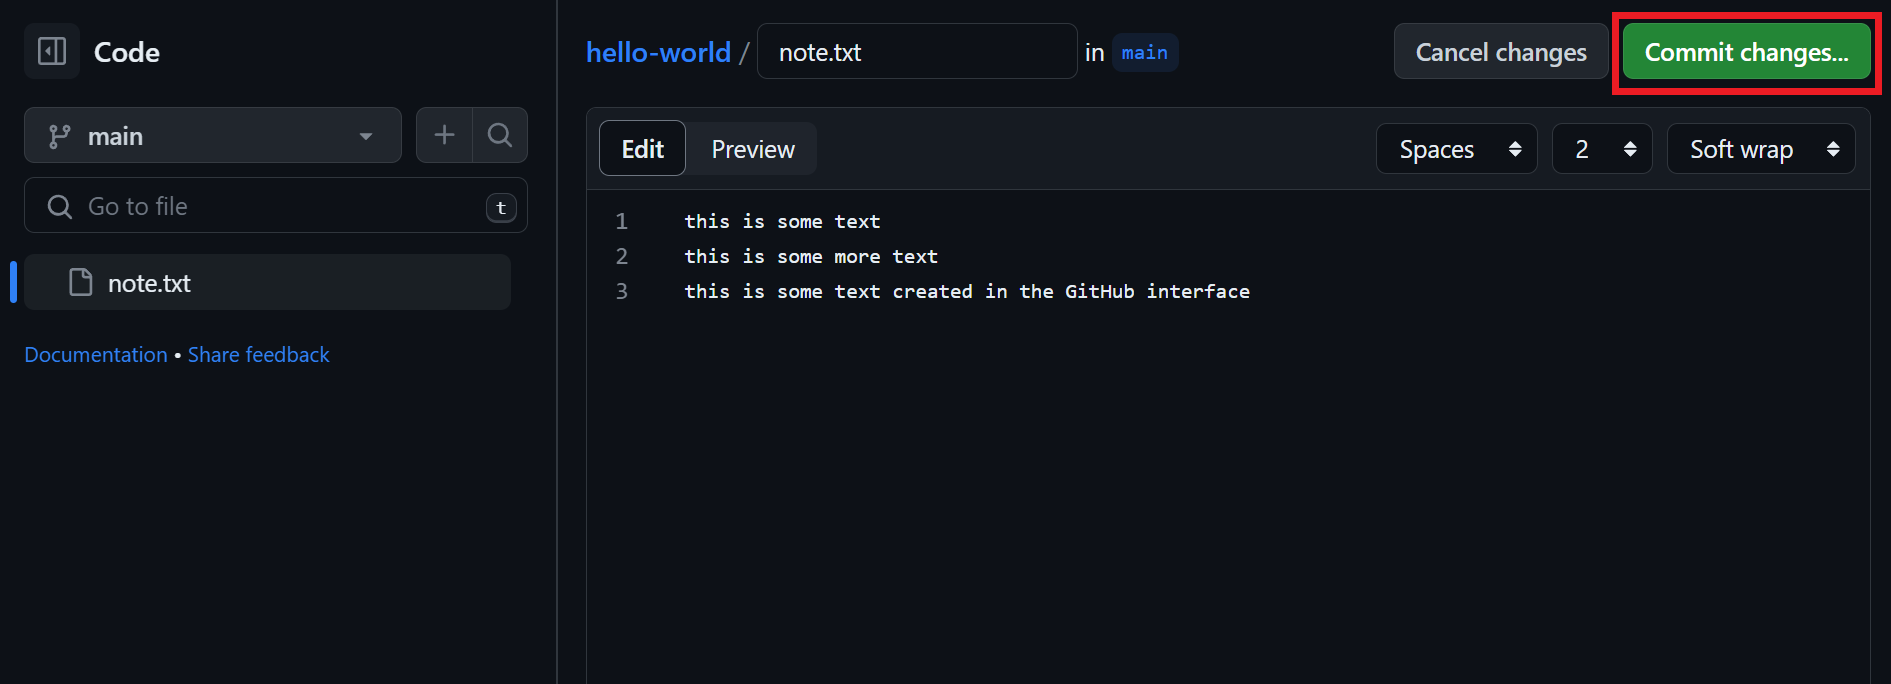
- Edit the file by adding or removing lines of text, and commit your changes.
Of course, if we look at the git log in our terminal, we’ll see that our newest commit has not shown up yet. That’s because we need to pull the changes down using the git pull command.
git pull
After a couple lines of output, your local repository should be synced up with your remote repository! You should also be able to see the new commits in git log.
It’s recommended to always pull before making any commits or changes. This reduces the chance of any nasty merge conflicts, which we won’t cover in this module.
Key Points / Summary
- We can connect our local repository to GitHub
- We have to pull and push to let the repositories communicate with each other